A Journey to the Roof of the Americas
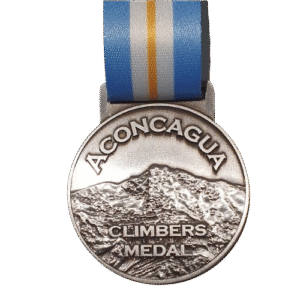
Standing at 6,961 meters (22,838 feet), Cerro Aconcagua isn’t just another mountain. It’s the highest peak outside of the Himalayas, the sovereign king of the Andes, and the ultimate test for aspiring high-altitude climbers. It’s a mountain that demands respect, preparation, and a serious dose of humility.
I recently returned from my own expedition to its summit, and I’m here to give you the unvarnished truth about what it takes to stand on top of the Americas. This isn’t just a trail hike; it’s a brutal, beautiful, and life-altering expedition.
The Mountain Itself: More Than Just a Number
Located in Mendoza province, Argentina, Aconcagua is the centrepiece of the Andes. Despite its staggering height, it is technically a non-technical climb via the Normal Route. Don’t let that fool you. “Non-technical” means you don’t need ropes, harnesses, or technical ice axes for ‘most’ of the climb. What it ‘does’ require is supreme physical fitness, relentless mental fortitude, and the ability to operate in a thin, oxygen-deprived atmosphere for weeks.
The mountain creates its own weather systems, and hurricane-force winds, whiteouts, and sudden temperature drops are common. The real challenge of Aconcagua is altitude and endurance.
Choosing Your Route: Normal vs. Polish Glacier
Most climbers (over 90%) attempt one of two main routes:
1. The Normal Route (Vía Normal): This is the most popular path. It’s a long, gruelling slog up a barren, rocky valley. The technical difficulty is low, but the physical and mental strain is immense. You will carry a heavy pack, navigate endless switchbacks, and spend days acclimatizing. The crux is the Canaleta – a 300-meter (1,000-foot) chute of loose scree just below the summit that feels endless in the thin air.
2. The Polish Glacier Route (Vía Glaciar de los Polacos): This is a more technical and committing climb, involving travel on a glacier and steeper ice and snow slopes. It requires crampon and ice axe skills, knowledge of glacier travel, and often involves setting up a high camp on the glacier itself. This route is less crowded and, many argue, more scenic and rewarding for experienced alpinists.
For this blog, I’ll focus on the experience of the Normal Route, as it was the route I took and it is also the gateway for most climbers.
The Expedition Timeline: A Day-by-Day Grind
● Days 1-3: Mendoza & Permits. You’ll arrive in the vibrant city of Mendoza, famous for its steak (enjoy it now!). Here, you must obtain your climbing permit from the Aconcagua Provincial Park office. This is a mandatory and detailed process. You’ll also have a final gear check with your guide service.
● Day 4: To Penitentes. A short drive from Mendoza to a small ski resort called Penitentes, your last taste of civilization (and a last hot shower) before entering the park.
● Day 5: Entrance to Confluencia. You enter the park, hop on a mule for your gear, and begin the first trek to Camp 1: Confluencia (3,400m / 11,150ft). This 4-5 hour hike is a beautiful introduction to the Aconcagua valley.
● Day 6: Acclimatization Hike to Plaza Francia. A key day! You’ll day-hike to the base of the South Face (Plaza Francia), a breathtaking viewpoint that showcases the mountain’s immense and terrifyingly beautiful sheer wall. This hike helps your body adapt to the altitude.
● Day 7: Trek to Base Camp (Plaza de Mulas). This is a long, tough day. You’ll cross the Vacas River valley and make the steep climb up to Plaza de Mulas (4,370m / 14,340ft). Arriving here feels like landing on the moon – a bustling tent city nestled in a barren, rocky landscape. You’ll spend the next 3-4 days here acclimatizing.
● Days 8-10: Base Camp Acclimatization. Your body is working hard to produce more red blood cells. You’ll do short hikes to higher elevations (like Cerro Bonete) and then descend to sleep, a strategy called “climb high, sleep low.” Rest, hydrate, and eat are your only jobs.
● Day 11: Carry to Camp 1 (Canada). You’ll pack a load of food, fuel, and gear and carry it up to Camp 1 (Canada) at 4,910m (16,100ft). This helps with acclimatization and lightens your load for the move tomorrow. You then descend back to Base Camp to sleep – a huge advantage for recovery.
● Day 12: Move to Camp 1. You pack up your personal gear and move up to Canada to occupy it. The air is noticeably thinner here.
● Day 13: Acclimatization at Camp 1. Another rest day. The pace of the expedition slows to a crawl. The views are incredible, but appetite and energy begin to wane.
● Day 14: Move to Camp 2 (Nido de Cóndores). A shorter but steeper move to Camp 2 (Nido de Cóndores) at 5,380m (17,650ft). You are now truly in the high Alps. Headaches are common. The priority is to melt snow, drink 4-5 liters of water, and force down calories.
● Day 15: Move to Camp 3 (Colera). The final push to high camp! Camp 3 (Colera) sits at a punishing 5,970m (19,580ft). The air is so thin that simple tasks like tying your boots leave you gasping for air. You’ll go to bed by 6 PM, trying to sleep with a racing heart, knowing the summit bid begins in a few hours.
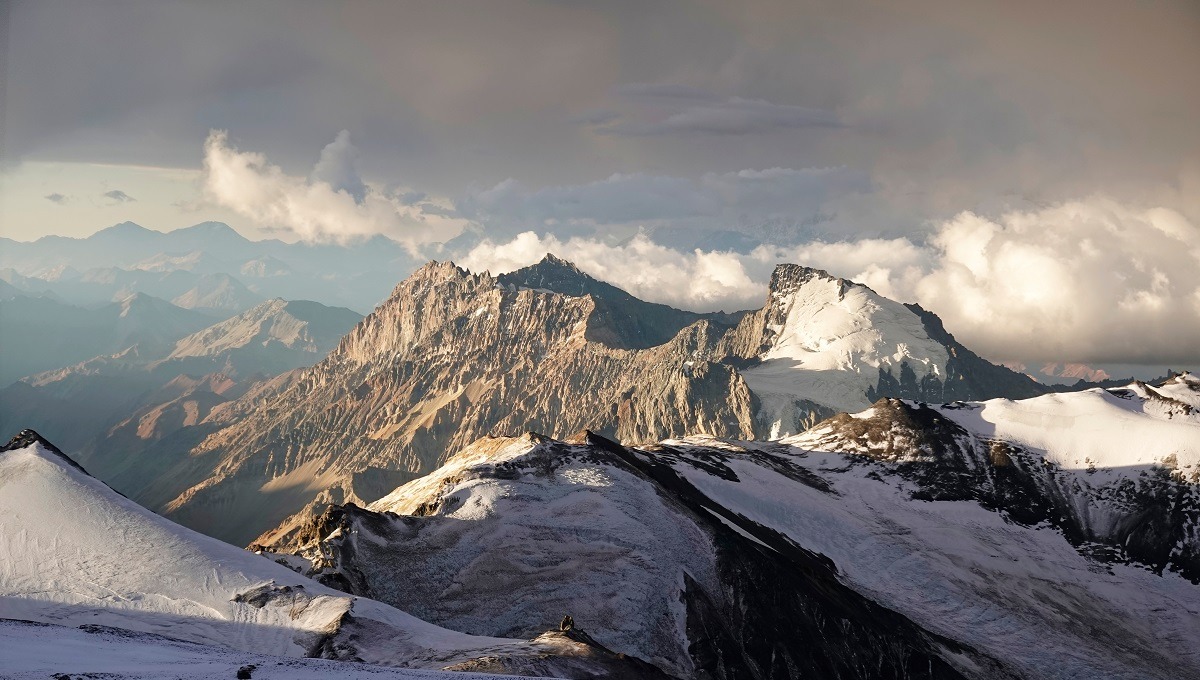
● Day 16: SUMMIT DAY. This is it. You’ll wake up around 3-4 AM, brew coffee, and set out into the freezing darkness with your headlamp. The day breaks over the Andes as you pass Independence Refuge (6,500m). The grind continues up the treacherous Traverse, a narrow path across the mountain’s face. Then, the final boss: the Canaleta. This soul-crushing scree slope is a mental and physical battle of one step, one breath. Finally, you crest the ridge and see the summit cross. The emotion is overwhelming. You’ve made it. The 360-degree view of the Andes is a reward beyond words. But remember, you’re only halfway – the descent back to high camp is long and exhausting.
● Days 17-19: The Descent. You’ll break down all camps and descend all the way back to Plaza de Mulas, then out to the road head. The feeling of breathing thick air is euphoric. The celebration that night at Base Camp is legendary.
● Day 20: Return to Mendoza. Back to steak and a real bed! You’ll look in the mirror and see a gaunt, wind-burnt face staring back – a badge of honour.
The Gear: Your Lifeline on the Mountain
Your gear cannot fail. This is not the place to cut corners.
● Footwear: Sturdy, well-broken-in double-layer mountaineering boots (like La Sportiva G2SM or Scarpa Phantom 6000) are NON-NEGOTIATABLE. Your toes will thank you.
● Layering System: A technical, moisture-wicking base layer, insulating mid-layers (fleece, down), and a bombproof Gore-Tex hardshell jacket and pants.
● Extreme Cold Gear: A heavyweight expedition-grade down parka for rest stops and summit day. Heavyweight gloves and mittens system.
● Sleeping: A sleeping bag rated to at least -20°F / -29°C and a high-R-value sleeping pad.
● Other Essentials: A high-UV buff/sunglasses, a 70+ liter backpack, trekking poles, a high-quality headlamp, and a professional medical kit that includes Diamox (for altitude) and painkillers.
The Cost: A Significant Investment
Climbing Aconcagua is expensive. A guided expedition can cost anywhere from £3,500 to £5,500+. This typically includes permits, guides, mules for group gear, food on the mountain, and base camp services (tents, meals). It does not include international flights, personal gear rental, insurance (emergency evacuation insurance is mandatory), or tips for guides.
The Mental Game: The Real Battle
The summit is only 50% physical. The other 50% is in your head.
● Embrace the Suffering: There will be days you feel terrible. You’ll be cold, tired, and nauseous. Accept it. This is the process.
● One Step at a Time: On summit day, don’t look at the top. Focus on the next five steps. Then the next five. Break the mountain down into tiny, manageable pieces.
● Listen to Your Body (and Your Guides): Altitude sickness is a real and dangerous threat. Be honest about your symptoms. A good guide will turn you around if needed. The mountain will always be there; your goal is to return safely.
Final Thoughts: Is Aconcagua for You?
Climbing Aconcagua was the hardest thing I have ever done. It broke me down and built me back up. It’s not a climb you do on a whim. It requires months of dedicated training with a heavy pack, significant financial investment, and a deep-seated resolve.
But if you prepare properly, respect the mountain, and have a little luck with the weather, the reward is unparalleled. Standing on the summit of the Americas, looking out over a sea of peaks, you’ll know you’ve achieved something extraordinary.
Disclaimer: This blog is based on personal experience and research. Climbing high-altitude mountains is inherently dangerous. It is highly recommended to use a reputable guide service and ensure you are physically and mentally prepared for the challenge.
#Aconcagua #SummitAconcagua #AconcaguaClimb #Mountaineering #HighAltitude #SevenSummits #Andes #AdventureTravel #ClimbingTheAmericas #AltitudeTraining #MendozaArgentina #OutdoorBlog #TravelBlog #MountaineeringLife #EpicAdventures #GetOutside #ExploreTheWorld #ChallengeYourself #JourneyToTheSummit #SummitSuccess #AdventureTime #MountainViews #GetOutside #PeakBagging #TeamHike #CharityClimb #ChallengeAccepted #HikeForACause #ClimbForACause #CharityClimb #TogetherWeClimb #mountaintopmedals